Rust: Playing with tui-rs
Rust is a perfect language for command-line applications. Among these applications, some have a very rich interface, for example, Zenith, Bottom, GitUI, Diskonaut. These applications are built with tui-rs, a library that abstracts the terminal drawing mechanism.
Although they are limited, a rich terminal application has some advantages:
First, it is important to understand that a rich terminal application is intended for a human. He had to interact with the keyboard. shortcuts. This clear shortcoming turns to be an advantage, it's much more efficient to interact with the keyboard rather than a mouse or a finger. Yet, to have a decent UX, we display a contextualized list of keyboard shortcuts.
Also, by nature, the application is much lighter than what we could do with native or browser-based interfaces (like Electron). And with the right backend, it's multi-platform.
Finally, the last point (and, of course, the most important 😉) is that it gives you the feeling of power.
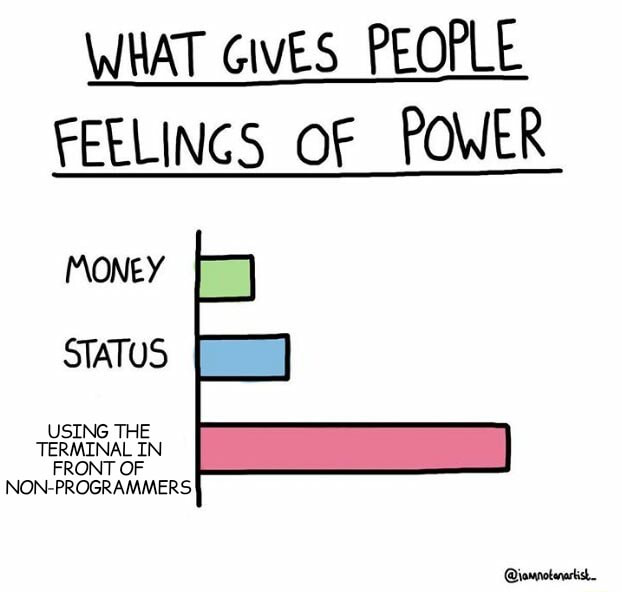
What?
We are going to create a simple application whose main feature is to sleep a certain number of seconds. Although sleep is an important part of health, for an application it is quite useless. But this needs solving a very important problem: we don't want to block the display of the application while it's sleeping.
We also focus on the structure of this application, rather than on the details related to the UI. This makes it an interesting base to build a real rich terminal application.
For that, we take inspiration from what is done in spotify-tui, some parts are copied and pasted.
Disclaimer: there is no single right way to structure applications, you may find here the influence of my Java & Web background. You are, of course, welcome to suggest improvements.
Step-by-step solution
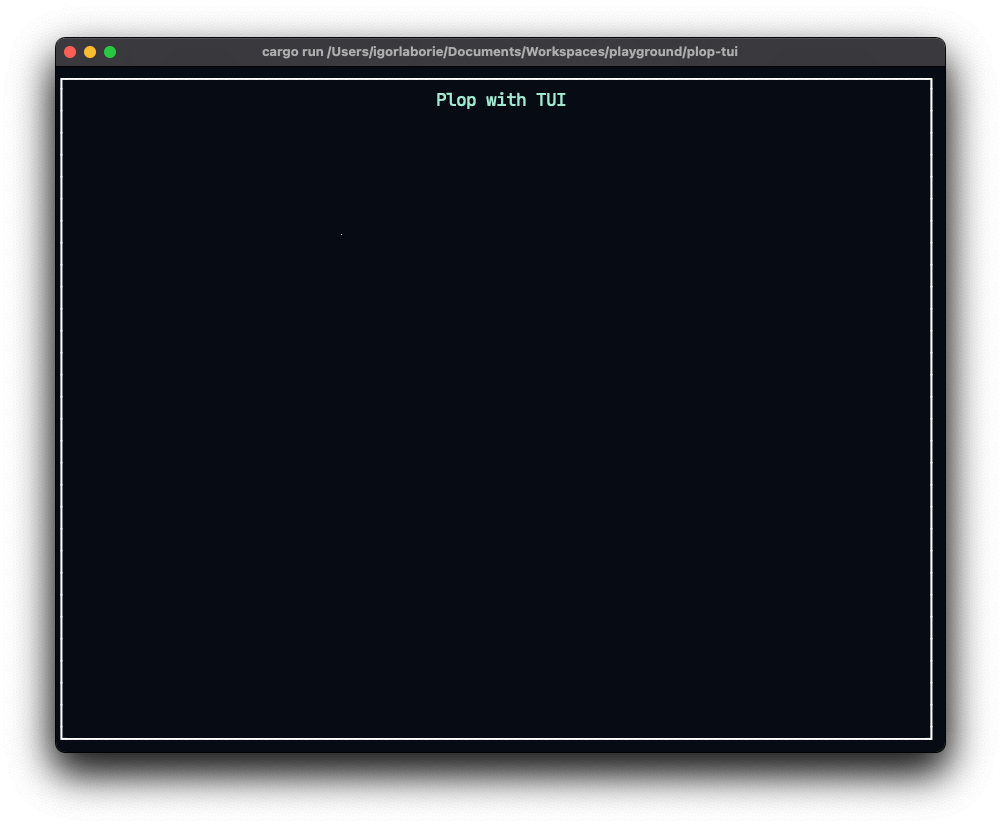
Step 0 - Hello World
We need few libraries.
[dependencies]
tui = { version = "0.15", features = ["crossterm"], default-features = false }
crossterm = "0.19"

tokio = { version = "1", features = ["full"] }
eyre = "0.6"

log = "0.4"
tui-logger = { git = "https://github.com/gin66/tui-logger", rev = "3a3568e2464dddc2205e071234135998342d7f1d" }
To start we use tui-rs, and we use the backend crossterm to draw on the terminal.
Then we use tokio as our I/O async/await runtime.
We won't go into detail about error handling, to simplify we use eyre.
Finally, we add logs and display them in our application with log and tui-logger.
At the time of writing this article, tui-logger is not yet compatible with the latest tui-rs version.At this stage, here is the source tree.
📂 app
   🦀 mod.rs
   🦀 state.rs
   🦀 ui.rs
🦀 lib.rs
🦀 main.rs
For now, this structure is far too complex for a simple hello world. , The organization will become more relevant as we add more elements.
As usual, we don't do much code in the main.rs to delegate it.
// main.rs
fn main() -> Result<()> {
    let app = Rc::new(RefCell::new(App::new())); // TODO app is useless for now
    start_ui(app)?;
    Ok(())
}
And in the lib.rs, we configure our terminal to use the raw mode and restore the terminal at the end.
// lib.rs
pub fn start_ui(app: Rc<RefCell<App>>) -> Result<()> {
    // Configure Crossterm backend for tui
    let stdout = stdout();
    crossterm::terminal::enable_raw_mode()?;
    let backend = CrosstermBackend::new(stdout);
    let mut terminal = Terminal::new(backend)?;
    terminal.clear()?;
    terminal.hide_cursor()?;

    loop {
        let app = app.borrow();
        // Render
        terminal.draw(|rect| ui::draw(rect, &app))?;
        // TODO handle inputs here
    }

    // Restore the terminal and close application
    terminal.clear()?;
    terminal.show_cursor()?;
    crossterm::terminal::disable_raw_mode()?;

    Ok(())
}
It is important to note that this code runs in the main thread. Thou shall not block the UI thread with I/O.⚠️ For now, we don't process the inputs in the loop, so we can't exit the application without killing it.
For a hello world, we don't need our App, but for now, we say that it contains an AppState. We use this state later.
For the code about the display, we start by putting it in the app::ui separate module.
// app/ui.rs
pub fn draw<B>(rect: &mut Frame<B>, _app: &App)
where
    B: Backend,
{
    let size = rect.size();
    // TODO check size

    // Vertical layout
    let chunks = Layout::default()
        .direction(Direction::Vertical)
        .constraints([Constraint::Length(3)].as_ref())
        .split(size);

    // Title block
    let title = draw_title();
    rect.render_widget(title, chunks[0]);
}

fn draw_title<'a>() -> Paragraph<'a> {
    Paragraph::new("Plop with TUI")
        .style(Style::default().fg(Color::LightCyan))
        .alignment(Alignment::Center)
        .block(
            Block::default()
                .borders(Borders::ALL)
                .style(Style::default().fg(Color::White))
                .border_type(BorderType::Plain),
        )
}
We won't dwell on the specific UI code.
One of the problems we may have to solve is that depending on the size of our window, we may have to adapt the layout.
Here we reject window sizes that are too small for what we want to do by using a panic!, it's a bit rough, but it does the job.
fn check_size(rect: &Rect) {
    if rect.width < 52 {
        panic!("Require width >= 52, (got {})", rect.width);
    }
    if rect.height < 28 {
        panic!("Require height >= 28, (got {})", rect.height);
    }
}
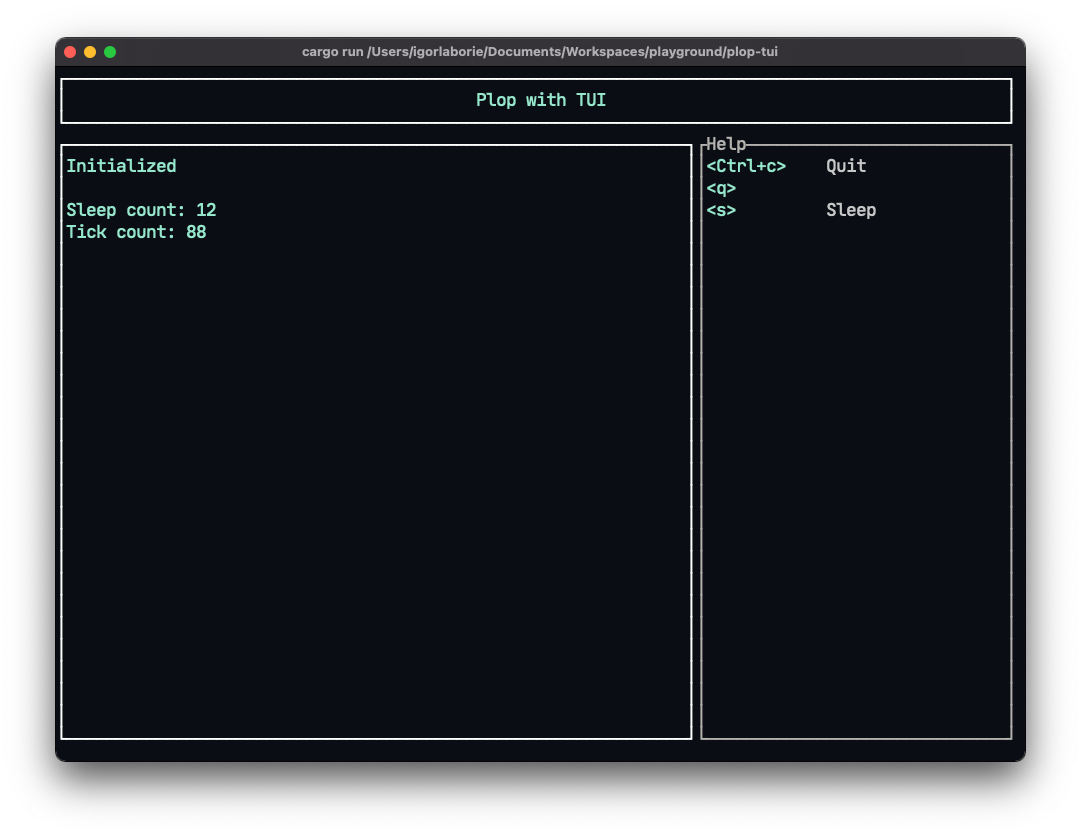
You can find the code at this step here.
Here, not only the application is useless, but we are forced to kill it to get out. We can't leave things as they are, we add to continue.
This isn't a bug, it's a Vi feature!
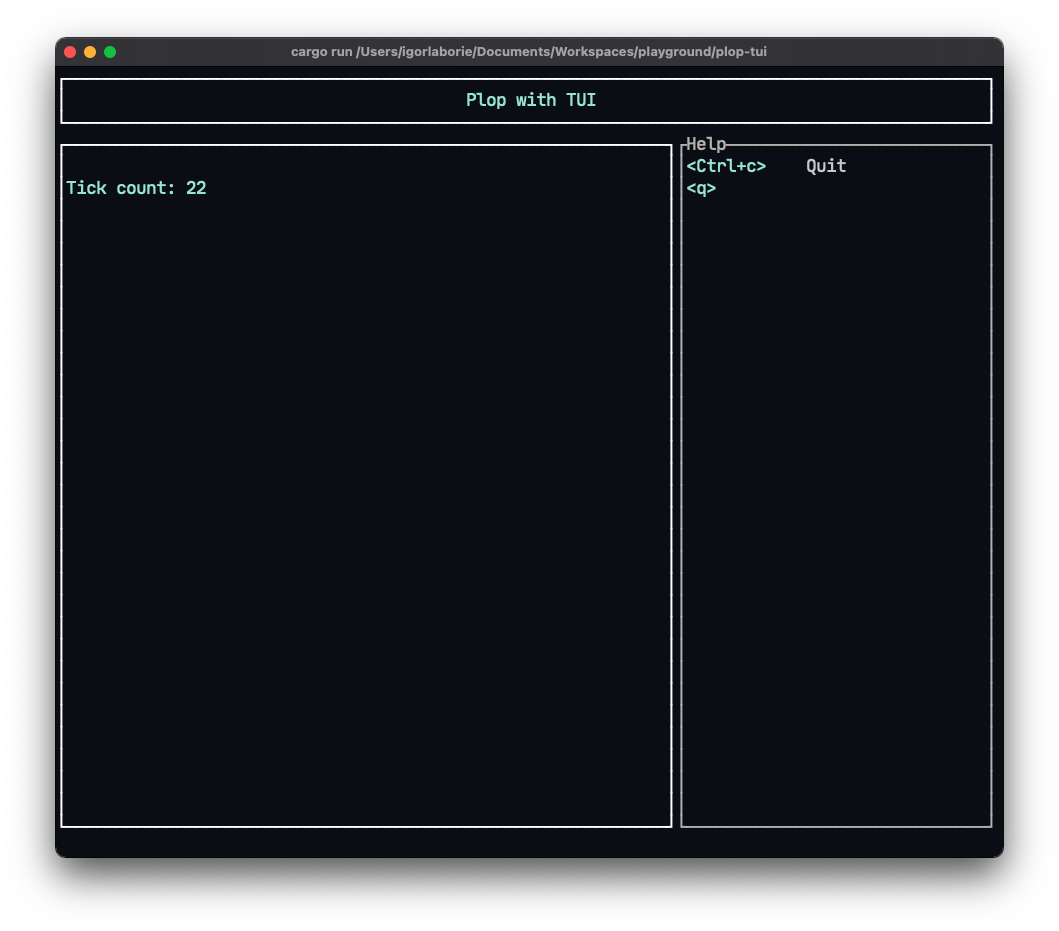
Step 1 - Event loop, inputs, and actions
In this step, we are going to handle user actions, for example, to exit the application we can use the keyboard shortcuts q or Ctrl+c.
To begin with, we represent the possible entries with an enum.
// inputs/mod.rs
pub enum InputEvent {
    /// An input event occurred.
    Input(Key),
    /// An tick event occurred.
    Tick,
}
The main idea is that we leave a certain amount of time (for example 200ms) for the user to interact with the keyboard. If this is the case, we generate an InputEvent::Input(key), otherwise, we generate an InputEvent::Tick.
For convenience, we do not use a crossterm::event::KeyEvent in the InputEvent::Input, but an enum from spotify-tui::event::key.
Still taking inspiration from spotify-tui, we isolate the user input in the inputs::events module.
We use a mpsc::channel to transfer the events to the main thread.
// inputs/events.rs
pub struct Events {
    rx: Receiver<InputEvent>,
    // Need to be kept around to prevent disposing the sender side.
    _tx: Sender<InputEvent>,
}

impl Events {
    pub fn new(tick_rate: Duration) -> Events {
        let (tx, rx) = channel();

        let event_tx = tx.clone(); // the thread::spawn own event_tx
        thread::spawn(move || {
            loop {
                // poll for tick rate duration, if no event, sent tick event.
                if crossterm::event::poll(tick_rate).unwrap() {
                    if let event::Event::Key(key) = event::read().unwrap() {
                        let key = Key::from(key);
                        event_tx.send(InputEvent::Input(key)).unwrap();
                    }
                }
                event_tx.send(InputEvent::Tick).unwrap();
            }
        });

        Events { rx, _tx: tx }
    }

    /// Attempts to read an event.
    /// This function block the current thread.
    pub fn next(&self) -> Result<InputEvent, RecvError> {
        self.rx.recv()
    }
}
Next, in our lib.rs, we can handle inputs.
// lib.rs
pub fn start_ui(app: Rc<RefCell<App>>) -> Result<()> {
    // Configure Crossterm backend for tui
    // ... code omitted here

    // ① User event handler
    let tick_rate = Duration::from_millis(200);
    let events = Events::new(tick_rate);

    loop {
        let mut app = app.borrow_mut();

        // Render
        terminal.draw(|rect| ui::draw(rect, &app))?;

        // ② Handle inputs
        let result = match events.next()? {
            // ③ let's process that event
            InputEvent::Input(key) => app.do_action(key),
            // ④ handle no user input
            InputEvent::Tick => app.update_on_tick(),
        };
        // ⑤ Check if we should exit
        if result == AppReturn::Exit {
            break;
        }
    }

    // Restore the terminal and close application
    // ... code omitted here

    Ok(())
}
①: we use our Events to capture the inputs.
②: we block the thread for at most tick_rate to receive an input.
For this kind of application, it is not necessary to reach 60fps, it is enough to refresh every 200ms.
③: we process the user input, that part could mutate the application.
④: we can imagine that we have to do processing in the application, it also could mutate the application.
⑤: we exit the loop to quit the application if the user press q or Ctrl+c.
One of the do_action or update_on_tick methods have to return AppReturn::Exit instead of AppReturn::Continue to quit the application.
// app/mod.rs
#[derive(Debug, PartialEq, Eq)]
pub enum AppReturn {
    Exit,
    Continue,
}

pub struct App {
    /// Contextual actions
    actions: Actions,
    /// State
    state: AppState,
}

impl App {
    pub fn new() -> Self { // for now it could be replaced with impl Default
        let actions = vec![Action::Quit].into();
        let state = AppState::initialized();
        Self { actions, state }
    }

    /// Handle a user action
    pub fn do_action(&mut self, key: Key) -> AppReturn {
        if let Some(action) = self.actions.find(key) {
            debug!("Run action [{:?}]", action);
            match action {
                Action::Quit => AppReturn::Exit,
            }
        } else {
            warn!("No action accociated to {}", key);
            AppReturn::Continue
        }
    }

    /// We could update the app or dispatch event on tick
    pub fn update_on_tick(&mut self) -> AppReturn {
        // here we just increment a counter
        self.state.incr_tick();
        AppReturn::Continue
    }

   // ...
}
Next, we define our actions in the app::actions module,
we use an enum for all the actions. In the current state, we use the Action::Quit.
Every action could have some associated inputs::Key.
Given the current state, the Actions structure wraps the set of available actions.
// app/actions.rs
#[derive(Debug, Clone, Copy, Eq, PartialEq)]
pub enum Action {
    Quit,
}

impl Action {
    /// All available actions
    pub fn iterator() -> Iter<'static, Action> {
        static ACTIONS: [Action; 1] = [Action::Quit];
        ACTIONS.iter()
    }

    /// List of key associated to action
    pub fn keys(&self) -> &[Key] {
        match self {
            Action::Quit => &[Key::Ctrl('c'), Key::Char('q')],
        }
    }
}

/// Could display a user-friendly short description of action
impl Display for Action {
    fn fmt(&self, f: &mut fmt::Formatter<'_>) -> fmt::Result {
        // ... implementation omitted
    }
}

/// The application should have some contextual actions.
#[derive(Default, Debug, Clone)]
pub struct Actions(Vec<Action>);

impl Actions {
    /// Given a key, find the corresponding action
    pub fn find(&self, key: Key) -> Option<&Action> {
        // ... implementation omitted
    }

    /// Get contextual actions.
    /// (just for building a help view)
    pub fn actions(&self) -> &[Action] {
        self.0.as_slice()
    }
}

impl From<Vec<Action>> for Actions {
    fn from(actions: Vec<Action>) -> Self {
        // ... implementation omitted
    }
}
Finally, we have everything to display the state information, and the contextual help.
You can find the code at this step here.
We have reached an interesting point here. By making an application whose aim is to stop, we can pay tribute to Claude Shannon 🇫🇷 Centenaire Shannon.
Step 2 - Async I/O
Now to take care of our sleep, we will use async functions.
It's also an opportunity to simulate an application startup that uses I/O.
It is frequent to read a file or make a network call during an initialization.
In the idea, it's quite close to what we see before processing user inputs.
But, to use syntactic sugar offered by the async/await we choose the tokio the tokio runtime.
To start, we add the Action::Sleep variant, with its Key::Char('s') keyboard shortcut and its documentation in app/actions.rs.
To represent the events that will be processed in the I/O thread we create an enum in a new io module:
// io/mod.rs
#[derive(Debug, Clone)]
pub enum IoEvent {
    Initialize,      // Launch to initialize the application
    Sleep(Duration), // Just take a little break
}
We process these events in an IoAsyncHandler.
This processing can change the application or its state, so we need to replace the Rc<RefCell<T>> with an Arc<Mutex<T>>.
If you are not (yet) quite familiar with these concepts see Interior Mutability Pattern and Shared-State Concurrency.
Here we use a tokio::sync::Mutex which requires a .await to get the lock.
// io/handler.rs
pub struct IoAsyncHandler {
    app: Arc<tokio::sync::Mutex<App>>,
}

impl IoAsyncHandler {
    pub fn new(app: Arc<tokio::sync::Mutex<App>>) -> Self {
        Self { app }
    }

    pub async fn handle_io_event(&mut self, io_event: IoEvent) {
        let result = match io_event {
            IoEvent::Initialize => self.do_initialize().await,
            IoEvent::Sleep(duration) => self.do_sleep(duration).await,
        };

        if let Err(err) = result {
            error!("Oops, something wrong happen: {:?}", err);
        }

        let mut app = self.app.lock().await;
        app.loaded(); // update app loading state
    }

    async fn do_initialize(&mut self) -> Result<()> {
        // ... implementation omitted
    }

    async fn do_sleep(&mut self, duration: Duration) -> Result<()> {
        info!("😴 Go to sleep for {:?}...", duration);
        tokio::time::sleep(duration).await; // Sleeping
        info!("⏰ Wake up !");
        // Notify the app for having slept
        let mut app = self.app.lock().await;
        app.slept();
        Ok(())
    }
}
Now let's use this IoAsyncHandler in the main.
// main.rs
#[tokio::main]
async fn main() -> Result<()> {
    // ① Create a channel for IoEvent
    let (sync_io_tx, mut sync_io_rx) = tokio::sync::mpsc::channel::<IoEvent>(100);

    // ② Create app
    let app = Arc::new(tokio::sync::Mutex::new(App::new(sync_io_tx.clone())));
    let app_ui = Arc::clone(&app);

    // ④ Handle I/O
    tokio::spawn(async move {
        let mut handler = IoAsyncHandler::new(app);
        while let Some(io_event) = sync_io_rx.recv().await {
            handler.handle_io_event(io_event).await;
        }
    });

    // ③ Start UI
    start_ui(&app_ui).await?;
    Ok(())
}
① We need to share the IoEvent between threads, we use the tokio channel.
You can of course use the standard lib channel as in Events, but here using Tokio simplifies the code in part ④.
② The application is shared and can be modified by more than one thread, so we go through an Arc<Mutex<T>>. Now we pass the IoEvent sender into the application so that a user action can trigger an IoEvent. (see below)
③ We create a thread in charge of processing the IoEvent. The IoEvent processing loop delegates to the IoAsyncHandler.
④ We need to make some changes in our start_ui because of our Arc<Mutex<T>>.
// lib.rs
pub async fn start_ui(app: &Arc<tokio::sync::Mutex<App>>) -> Result<()> {
    // ... code omitted
    loop {
        // Get a mutable reference on app
        let mut app = app.lock().await;
        // ...
    }
    // ...
}
Next, in our application, we add an attribute io_tx: tokio::sync::mpsc::Sender<IoEvent>, so the application can dispatch IoEvent.
Now we can complete the processing of app::actions::Action.
// app/mod.rs
impl App {

    /// Send a network event to the IO thread
    pub async fn dispatch(&mut self, action: IoEvent) {
        // `is_loading` will be set to false again after the async action has finished in io/handler.rs
        self.is_loading = true;
        if let Err(e) = self.io_tx.send(action).await {
            self.is_loading = false;
            error!("Error from dispatch {}", e);
        };
    }

    /// Handle a user action
    pub async fn do_action(&mut self, key: Key) -> AppReturn {
        if let Some(action) = self.actions.find(key) {
            debug!("Run action [{:?}]", action);
            match action {
                Action::Quit => AppReturn::Exit,
                Action::Sleep => {
                    if let Some(duration) = self.state.duration().cloned() {
                        // Sleep is an I/O action, we dispatch on the IO channel that's run on another thread
                        self.dispatch(IoEvent::Sleep(duration)).await
                    }
                    AppReturn::Continue
                }
            }
        } else {
            warn!("No action accociated to {}", key);
            AppReturn::Continue
        }
    }

    // ... code omitted
}
To continue this step, we will manage an utterly simple state machine.

To do this in the start_ui function, we will trigger an IoEvent::Initialize.
// lib.rs
pub async fn start_ui(app: &Arc<tokio::sync::Mutex<App>>) -> Result<()> {
    // ...

    // Trigger state change from Init to Initialized
    {
        let mut app = app.lock().await;
        // Here we assume the the first load is doing I/O
        app.dispatch(IoEvent::Initialize);
    } // lock goes out of scope here

    loop {
        //  ...
    }
    // ...
}
The application exposes a method for this state transition.
// app/mod.rs
impl App {
    pub fn initialized(&mut self) {
        // Update contextual actions
        self.actions = vec![Action::Quit, Action::Sleep].into();
        self.state = AppState::initialized()
    }
    // ...
}
To finish this step, we can update the Events to replace the standard lib channel with the one from Tokio. It produces a more consistent code, but it needs to break the loop when we want to stop the application. We use an Arc<AtomicBool> share the boolean that say when we need to break the input loop. To see these changes, you can look at this commit.
You can find the code at this step here.
Et voilà, we have a base to create a tui application.
Step 3 - Extra
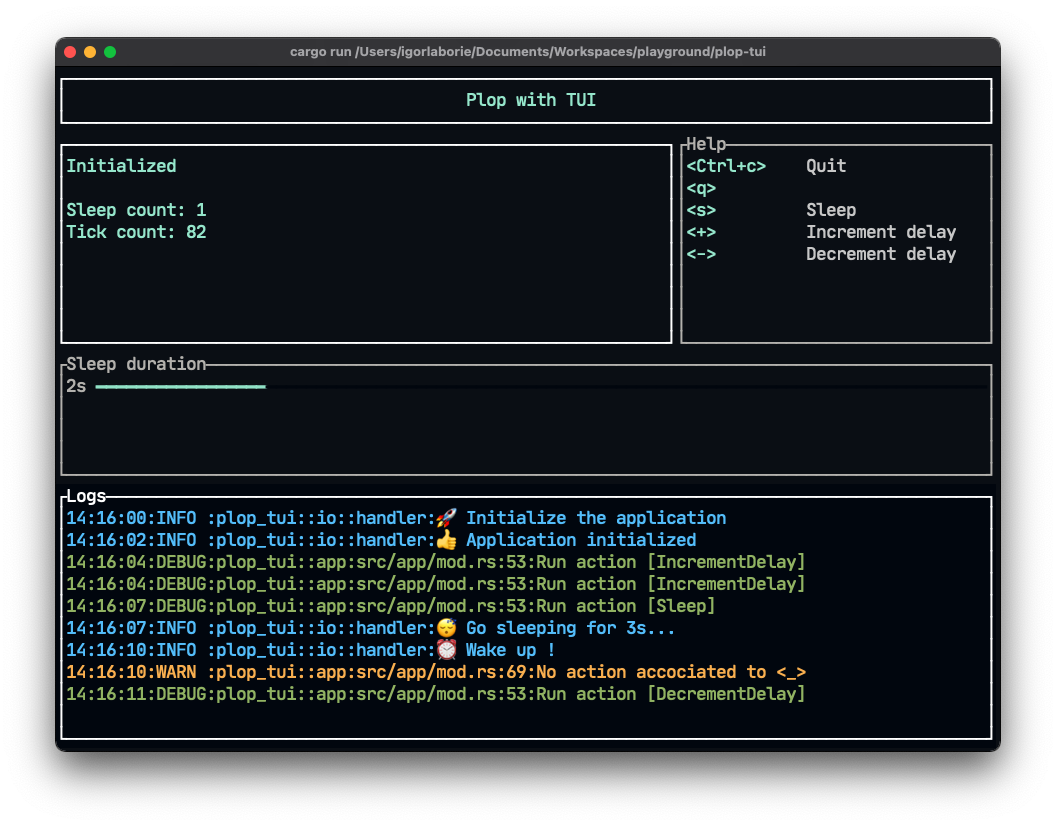
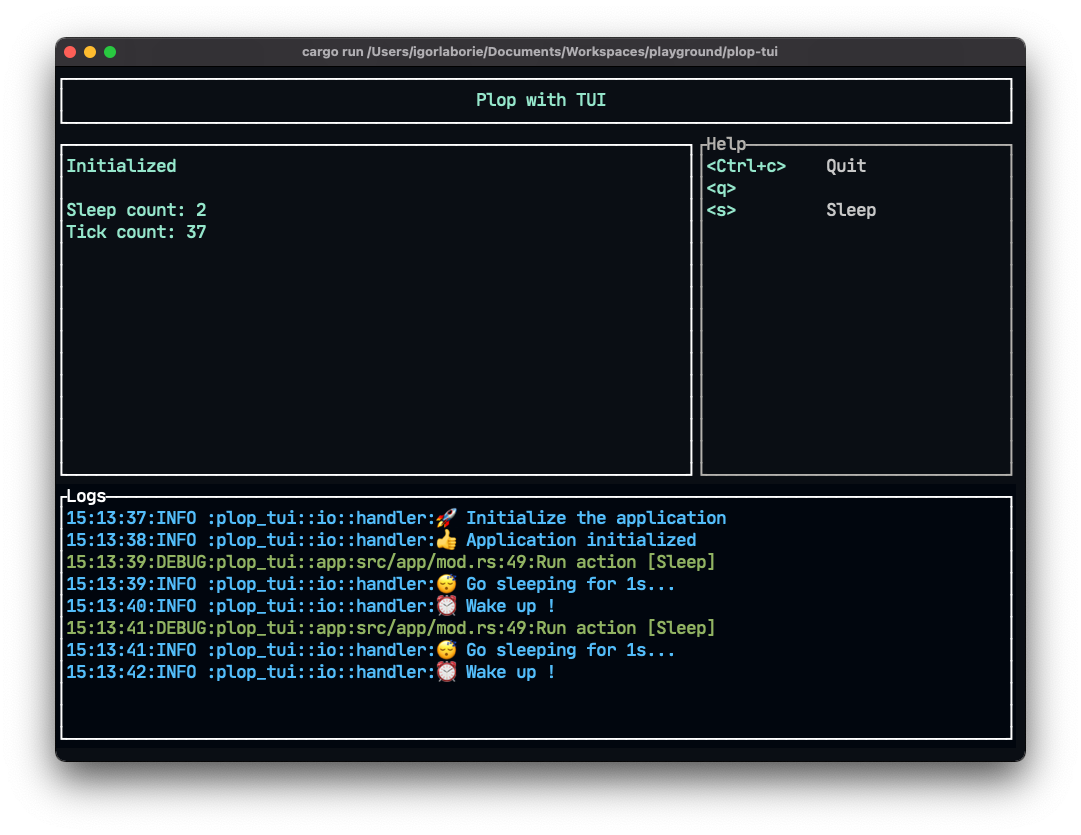
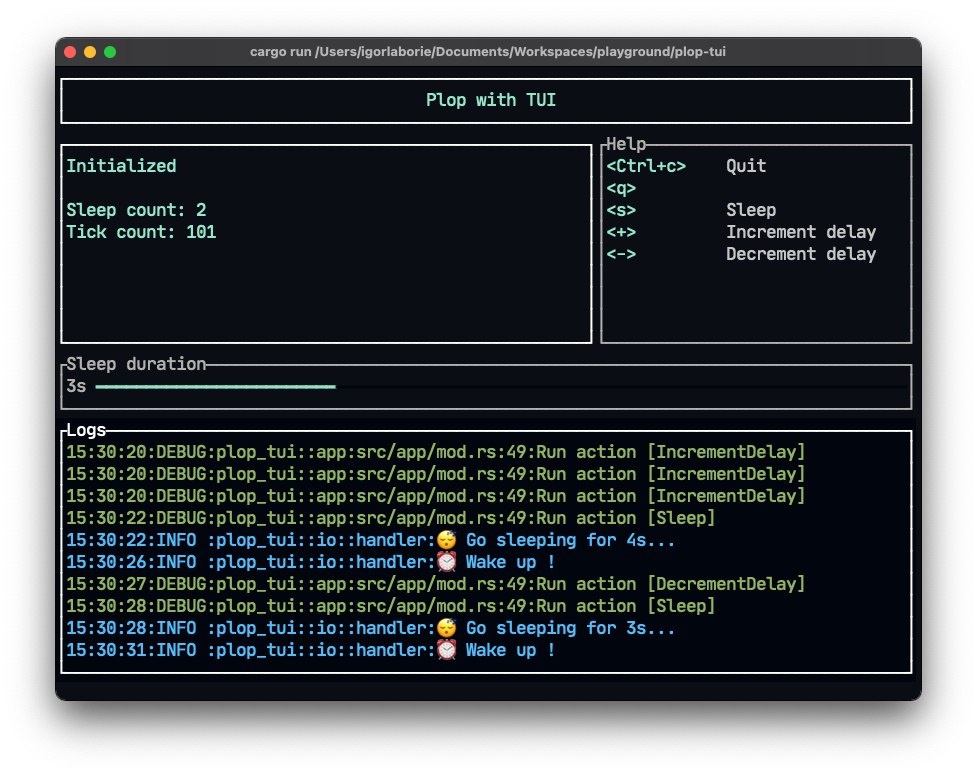
Now we can add features, like the possibility to change the sleep duration. But first, we'll start by displaying the logs.
Currently, in the project, we use the log facade, but we don't use any implementation. I like to use pretty_env_logger on simple projects. Here, the context is different, we want to see the logs in my UI. For that, there is an implementation that comes with a widget for tui: tui-logger.
First, we configure the log in the main.rs before starting the I/O thread.
This implementation captures the logs to display them in a widget.
// Configure log
tui_logger::init_logger(LevelFilter::Debug).unwrap();
tui_logger::set_default_level(log::LevelFilter::Debug);
Then we have to add the widget in our layout:
// app/ui.rs
fn draw_logs<'a>() -> TuiLoggerWidget<'a> {
    TuiLoggerWidget::default()
        .style_error(Style::default().fg(Color::Red))
        .style_debug(Style::default().fg(Color::Green))
        .style_warn(Style::default().fg(Color::Yellow))
        .style_trace(Style::default().fg(Color::Gray))
        .style_info(Style::default().fg(Color::Blue))
        .block(
            Block::default()
                .title("Logs")
                .border_style(Style::default().fg(Color::White).bg(Color::Black))
                .borders(Borders::ALL),
        )
        .style(Style::default().fg(Color::White).bg(Color::Black))
}
You can also use the smart widget that allows you to filter the messages you want to see.
To change the sleep duration, we'll use a tui::widgets::LineGauge. The actions Action::IncrementDelay and Action::DecrementDelay can update the sleeping duration.
// app/ui.rs
fn draw_duration(duration: &Duration) -> LineGauge {
    let sec = duration.as_secs();
    let label = format!("{}s", sec);
    let ratio = sec as f64 / 10.0;
    LineGauge::default()
        .block(
            Block::default()
                .borders(Borders::ALL)
                .title("Sleep duration"),
        )
        .gauge_style(
            Style::default()
                .fg(Color::Cyan)
                .bg(Color::Black)
                .add_modifier(Modifier::BOLD),
        )
        .line_set(line::THICK)
        .label(label)
        .ratio(ratio)
}
To keep the value within an appropriate range, we used a clamp in our state.
Or we could have enhanced our Actions to make our actions disable/enable depending on our state.
Conclusion
Getting past the little pitfalls, it's pretty easy to make a rich end-user application. You can do some nice things once this structure is in place. It's a pity to deprive yourself of this possibility when your application lends itself well to it.
But, compared to what you can do on the Web, it's quite heavy to make a layout. I indeed love CSS and the new Flex and Grid layouts, and it's hard to do without them once you're used to them. We can do something interesting with declarative macros to reduce the boilerplate. To investigate if you are motivated.
For my part, I prefer to leave it there, all this made me want to sleep. 🦥
You can find the source code here, and I leave you some useful links to finish:
- To start with Rust: Rust Book
- Rust book for command-line applications Rust CLI Book
- Another article Improving spotify-tui: going async
- An alternative that uses ncurses: Cursive